Thursday, December 31, 2015

2015 in Review

As 2015 comes to its end I often reflect on the year and take stock.

Less travel this year and no teaching commitments made for a more relaxed schedule. 
Although I felt somewhat lost for a good while there. It was strange not having to be 'on-the-go'.

I had bronchitis early in 2015 - the sickest I can ever remember feeling.
They say when you relax is when sickness can happen. Kind of making room for it.

I again entered the Battle of the Beadsmith with my "Francesca" design and lasted for a few rounds, That was nice to have happen.
I released my "Francesca" tutorial and it is one of my best selling tutorials. 

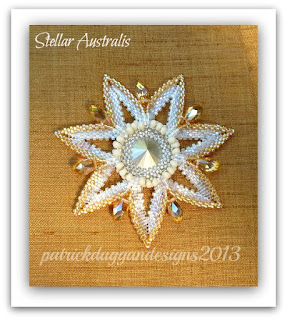
I entered an Australian competition and was in the top ten finalists. Since it was my own beading community, being in the finalists was very gratifying.

I accepted a teaching gig in USA for 2016 which I am really looking forward to - (more details later).

I managed to have a tutorial published in Beadwork magazine, that was great to achieve. 
You know it takes a year for something like this to happen. Sheesh!!

So, on the achievement level I haven't done too badly.

My passion for beading fluctuated throughout the year, coming and going, returning then leaving again.
New designs have been created - but not shown -  as I have plans for these in 2016.

A long friendship came to an end, without regrets. An even older friendship was renewed and strengthened, with much joy. Wonderful how nature balances !!

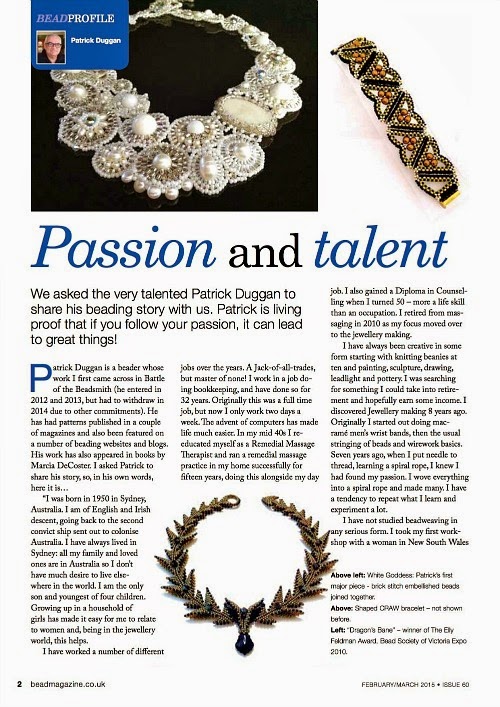
My attitude to retiring has shifted somewhat. Having wanted to retire at age 55 (but financially unable to), I am now 65 and financially able to. Earlier this year I realised I enjoy working two days a week. It gets me out of the house and interacting with others - not to mention it pays most of the bills  LOL !
Maybe the "wisdom" gene kicked in as retirement loomed nearer. 
So my job will continue as long as they want me there ! 

Having lived in my current home for over 22 years I am feeling in the need for a change of scenery. 
Maintaining a three bedroom house with front and back gardens is more than I wish for these days.       I have been craving a sea or tree change further out of Sydney but still reachable. 
I am thinking I'll rent my home then rent a property where I would like to live. Sort of  'try before I buy'.  I shall be exploring this further in 2016, after I get my home ready for rental.

That pretty much sums up the events of my year. How would I describe the year ??  
I would say 2015 was 'Grounding' - bringing me back to earth, back to myself, helping me to see 
where I want to go in the near future.

So with the ending of 2015 I wish all a Very Happy New Year
and may 2016 bring your heart's desire. 


Wednesday, December 16, 2015

Wednesday, November 25, 2015

A Friendly Reminder - Christmas Ornament Tutorials in my store.


ANAHATA STAR

The time for making Christmas presents and gift box ornaments is upon us already

I am taking the liberty to remind you I have a few items in my tutorial store on ArtFire.

If you like any and want to purchase the tutorial/s just click on the ArtFire link on the righthand side of my blog.
Cheers……Patrick

STELLA AUSTRALIS - the seven pointed star.


THE CHRISTMAS TREES - a tree ornament, gift box ornament, and earrings (if made in 15s)


Wednesday, November 18, 2015

Where is my Mojo? What do I Create Now?

I have been very busy fulfilling beading commitments and lately I have not had a lot of time to sit and play with beads. Since these commitments have been slowly fulfilled and taken off the 'to do' list 
I now sit at my bead mat, look at all the abandoned sample pieces and ask myself
"what would I like to make now?"

I wouldn't have a clue !!!

I have sat there, I have sat there and I have sat there.
I have taken samples, pulled them apart and put the beads away, just to give myself something to do. 
I have opened drawers of finished items and looked at them - asking myself "how the hell did I make this one?" "Do I want to make another?" Nah - that was then this is now!! 

I have been in this space before - no design ideas flowing.  Not knowing what to make, not liking what I do attempt to make, wanting a new direction, not knowing what that direction is.
I occupy my time, putting new beads away, tidying up my bead table - all in the hope something will trigger an idea. 

The longer I am in this space the more it begins to affect my mood. I find I become short tempered, irritable, the cat gets yelled at - even though the cat is the cat and doesn't change from one day to the next!!!  
It is me and I am disgruntled, I lose patience with other things, and I just begin to feel, lost, directionless, not very fulfilled. I worry that maybe my design mojo will not return.
Heaven forbid !!!

Who would have thought that beading governs so much of my everyday life?   

Is it the beading that governs?? or is it that small part of my day whereby I shut out the rest of life and immerse myself in "the NOW" - like the buddhists say we should do each day - meditate. 

When I bead I am totally focussed on what is in my hand, what I am creating - immersed in the NOW.
Am I missing the beading, the making of something new, or am I missing that time whereby 
I live in the moment?

To me it is a combination of both. A combination of time out (from life) to play (and create). 
That is what I am missing, causing me to feel unfulfilled. 

BUT - there is good news!
Whenever I have been in this space before - and there have been a few times - when my mojo is ready to flow again, generally new passion is forthcoming.  

I am looking forward to it so in the meantime, I deconstruct and tidy, making ready for the Mojo!


Saturday, November 7, 2015

The Christmas Tree - an eTutorial newly released

I recently finished writing the tutorial for my Christmas Tree.
This pattern is a beginner's level pattern and can be used as earrings, a tree ornament, a gift tag ornament for presents, as well as a Festive Season pendant if worn on a chain.

I hope you like them.
Click on the image and you will be taken to my Artfire Tutorial Store if you wish. 

Saturday, September 26, 2015

The Sydney Bead Show - Part 1 - Lampworkers

Earlier this month I was happy to attend the Sydney Bead Show. Whilst there I got to thinking how we have so much talent in Australia and I was wondering if the rest of the world would like to see some.
I asked the Bead Show organisers if I may do a story or two for my blog and with their permission I would like to introduce you to some of our lamp workers and their art - in no particular order.

Wendy Bergamin - Bergamin Beads http://www.bergaminbeads.com
I started lampworking around May 2007 I have been involved with art and crafts all my life, ever since I learnt to use a sewing machine at age six. I trained as a secondary school Arts and Crafts teacher and taught for over a decade. I then started beading wedding dresses for a private firm and had three finalist entries in 'The Gown of The Year' as 'The Little Aussie Beader'
After that I started a children's clothing label 'Birichino' followed by several years of making collectable teddy bears out of German mohair. This led onto making lamp work beads which in turn led me into making jewellery. I wanted to get more into jewellery so I went to several classes both here and in America with lamp work bead artists and lapidaries.
I have traded in shows around Australia with both the bears and then lamp work beads. I then went onto trading at the Bead and Button show in the U.S. I have been trading there for nine years now and for the past two years I have been at The Best Bead Show in Tucson. I sell lamp work beads, gemstone cabochons, which I polish myself, and also finished jewellery, combining both lamp work beads, cabochons and other gemstones.
For the last four years I have attended classes with Native American Indians and have been learning more metal working. I now do a lot of gemstone in Viking knitting and Kumihimo braiding with gemstones. My work is available on my website, at shows and also at The Studio at Flinders art gallery.

 Yunita YUDODIHARDJO - Yuri Glass Art  -  https://www.facebook.com/YuniGlassArt

​I started lampworking around May 2007 after a 3 hour beginner class with a nice lady that worked at Finn's Glass, Revesby, NSW.​  I then read a lot of books, watched online tutorials that I could find, asked lots of questions on lamp working forums, with lots of practices in between. So basically, I'm self taught.

Encasing floral beads was the main reason I wanted to learn lampworking.  Jan Cahill and Kerry Harper are my favourite Australian lamp workers.  I mainly working on soft glass but occasionally I work on boro especially for sculpture works. I'm using cricket and mini CC torch with oxycon at the moment.  I mostly only melt glass on Saturday because I have full time job. (I work Sunday night - Friday morning)


Denise Smith - DKS Lampwork www.dkslampwork.com 
In 2003, I was talked into doing a lamp working class and fell in love with the process of melting glass to make beads. My beads are varied but feature a lot of flowers and geometric designs. 

All my beads are handmade by me in my studio in Sydney, Australia and go through the proper annealing process. I primarily use soft glass from Italy and the USA for their quality, vibrancy and colour.

Monday, September 7, 2015

"Brigit" The Goddess of Spring

When I first started beading we had a yearly Bead and Gem Show but with the global financial crisis the Bead & Gem Show became smaller and smaller and eventually ceased happening altogether.
 We were left without a show in Australia for a few years, which made it difficult to see and touch any of the new products coming into the market. 

Last year a new Bead Show began and was very successful (more will follow on The Bead Show soon) This year they held their first competition.
Generally I don't bother competing in anything, I don't really see myself as competitive, but this time I thought - why not have a go??

In April I designed "Brigit" and entered her in The Bead Show's inaugural Inspired Colour Competition. Here is Brigit's story and my inspiration.

In her maiden aspect the Goddess Brigit is honoured at the festival of Imbolc, which celebrates the first stirrings of Spring in the Celtic/Irish culture.

In my garden, due to a canopy of mature trees, not a lot of blooms happen. 
The first indication that Spring is on the way are my Clivias – luckily a shade loving plant and very prolific when flowering.  

Clivias can be found in a limited colour range with most of the common variety flower in varying shades of orange, therefore
I used the Clivia orange/s for my colour inspiration.

Not wanting to be too literal,  
the diamond shapes in my ‘rope’ represent leaves and how they bloom in varying shades of greens and different sizes. The three centrepieces are to represent the "flowers" of Spring.

I am not one who enjoys waiting to show a finished design so entering a competition in April and waiting to show images in September has been challenging and frustrating, but I managed.

Last week I received an email advising I was one of ten finalists in the competition. That was nice to know.


On Friday I attended the Bead Show and they announced the winner. Unfortunately it was not me but a beading buddy of mine. I was happy nevertheless as I am now able to show my design, and I hope you like "Brigit".
Will I enter next year? only time will tell.

I am very grateful to the presenters of The Bead Show and its sponsors for supporting Australian Beaders. 

If you would like to see the ten finalists and winner click on the link below


Sunday, August 23, 2015

eTutorial for my "Francesca" necklace is now available


Click on the picture above and you will be taken to my Artfire store for the "Francesca" tutorial.

Monday, August 17, 2015

Making the Count

I thought it a good idea to start sharing some of my beading insights and skills after all I have been beading for nine years now and surely have learnt some "tricks of the trade". I would also like to make this a practice on my blog and aim to share something more regularly - if I dont get too busy.

To start I would like to talk about doing a peyote bezel for a rivoli or a lunasoft cabachon - especially since I use so many of them.
My Seed Bead Count for Rivolis using size 11/0s:
In the nine years I have been beading I have found it easiest to double the millimetre size of the
rivoli and add four seed beads - it is as simple as that.
12mm Rivoli   12 x 2 + 4 = 28 seed beads
14mm Rivoli   14 x 2 + 4 = 32 seed beads
16mm Rivoli   16 x 2 + 4 = 36 seed beads
18mm Rivoli   18 x 2 + 4 = 40 seed beads

I know other artists will dispute this and that is okay. I have heard, and tried, other designers methods and over time found my method to be reliable - because I make it so.

You may say - "but what about the different types of seed beads???" That is a good question.

For this post, I am talking about using Japanese seed beads. Not Czech, Not Delicas, just Japanese seed beads and there are a lot of varieties.

Here you see a pic of some seed beads on a needle. You will note there are a variety of sizes even though they are the same seed bead from the same tube. Most seed beads have variations in size - you will get very thin ones, thin ones, medium ones, largish ones - all within the same tube of seed beads.

Artist's Tip: When beading, it pays to weed out the seeds that are too small and/or too large. I do not put them in my work. Whenever I have included noticeably different sized seed beads in my work my eye always notices that 'bump' or that 'dip' in the work. Very annoying!!  So I recommend you get used to culling seed beads.

You may ask - "But what about Toho seeds or Miyuki seeds?"  Yes, there are those seeds that are really good at being the same in size - BUT - you will still get some that are smaller/bigger.

This is where my theory comes into play.
I want to make a centrepiece, I want to have 10 pearls around the outside coming off the rivoli bezel. I require four seed beads in between each pearl to make it fit and not warp -
10 pearls x 4 seed beads in between = 40 seeds around my bezel. An 18mm rivoli is needed (see above chart).

When I am about to bezel a rivoli, I pick up my required number of size 11/o seed beads, I put my needle through the first bead picked up to turn it into a circle. I then place my rivoli inside that circle to see how it sits. Is it too small/tight??  Is it too large/loose??


Here you have a pic of two rings with a rivoli inside each. The seed beads are from the same tube, the rivolis are an 18mm, the seed count is the same.

The top one is picking up any seed bead from the tube and is too small.

The bottom one has a mixture of medium to large seed beads from that same tube. Notice the difference??  It fits the rivoli better !

The third image shows the seed bead rings and you can clearly see how much larger the bottom one is.

Is this confusing??  What I am saying is look through your seed beads and pick up the size of seed bead that will give you the count you require.

Making the Count to suit the seed bead: I wanted to use a particular colour Czech seed bead in a bezel once. I also wanted forty seeds in my count. Czech are smaller and would have required 46 seeds. So to achieve my needs I picked up 40 Japanese seed beads in the original ring to fit the rivoli,  then I used the Czech seeds in the peyote. That worked well as each time we do a row we want the bezel to reduce in size to surround the rivoli.

This method is simple and easily achievable. I hope my examples and the explanations are easy to understand. Should you need further clarification drop me a line.

Thursday, June 25, 2015

Battle of the Beadsmith 2015 - The making of my design "Francesca's Farfalle"


When I design I usually start with a centrepiece, then I make a ‘rope’ to suit. I worked in reverse for this design. I made the necklace section first - see image one.

For a competition like Battle of the Beadsmith I needed a little bit 'more' in my design. After all it is a competition.

I came up with another idea to increase the size of the necklace - see image two


I designed a "star" centre piece with some new components making another necklace. I had a job ahead of me adding the second section to the first. I wasn't certain of the rivoli sizes needed and originally made the joining sections with 16mm rivolis. 
This proved to be too large, causing it to buckle and impossible to join. Everything had to be pulled apart and 14mm rivolis used - see the unattached section in image two.


I had success eventually but felt my design still needed MORE. 
I tried adding pearls around the outer edge - see image three.

Standing back to look at the addition my first impression was - "the pearls look like something other people would do". I wasn't happy with them.


With pearls removed I added two half components to my piece for a better gradual widening - see image four.
I was finished and I lived with what I had for almost two weeks.

It is strange but over time I came to dislike the negative spaces formed between the two sections. I was happy with the colours, happy with the 'rope', happy with the second section but I wasn't happy with the two sections joined. 


I thought maybe if I added something extra I may like it more, so I added the small drop at the base of the 'star' centrepiece - see image five.

That was better and again I thought I am finished.


But not for long!!!


The negative spaces continued to annoy me. I felt the 'rope' was less than it should be so I pulled the two sections apart, revealing my favourite part of my design again. I was back to square one -
see image one.

Another, 'better' centrepiece was required. I improved my star shape centre, glammed it up a bit then made another smaller bezel,  joining them to form image six.

Yay!! I was happy and I was finished - again. 

I did feel the centrepiece was a tad on the large side, I even tried to make another star just a bit smaller. Me being me I try to improve on things and my next attempt didn't work satisfactorily so I had had enough by this stage and decided to go with the large star centre.

BUT not for long!!!

The closing date for the competition was approaching and it was picture taking time.

I took quite a lot of images and I showed a couple of my beading buddies and the feedback was "maybe if you take the pic at such and such an angle your centre may not look so LARGE.

I tried and tried but to no avail!! The bloody centre was JUST TOO DAMN BIG!!

Off it came.

I finally made another of the bezelled rivolis and took it further - see image eight.

I was very happy with this one and felt it was finally done.

I liked my rope, I liked my small centrepiece bezel and I liked the new centrepiece bezel as it was a combination of both the rope and the small bezel. It was integrated and complete - pheeew!! just in time for pic taking and meeting the deadline.


I wanted to write this post to show all the toil there can be in a competition piece. 
I want to convey not all designs come easily. Maybe if I had done what I usually do, centrepiece first then rope I may not have had as much trouble. I will never know.
The journey along the way has taught me so much, new ideas and centres will spring from this
so called 'toil'. More like my passion for designing.

In the end I am very pleased with
'Francesca's Farfalle' and my entry has been very well received by the beading community,
beyond my expectations.
PS: the large Star centrepiece I sold to my neighbour as she loved it. 
It is now a pendant on its own.

Saturday, April 4, 2015

My Starman Trendsetters earrings called "Sunray"


I have previously mentioned being a Starman Trendsetter and today I can show these
new earrings I designed for them. They are called 'Sunray'.

I am also happy to say these feature in the latest Starman catalogue also, happy dance.

The tutorial is now listed in my Artfire store, just click on the image above
or the Artfire link on the side bar.

Saturday, March 21, 2015

Working with the new Czechmates Crescent two hole bead

As you may know I am a Starman Trendsetter, which means I receive newly designed beads and I get the chance to play with them and see what I can create.

How good is that?

Image 1 - Here is the newly released Czechmate Crescent two hole bead. Like a Moon shape aren't they?

Having had a lot of other commitments to get done I had not had much time for just sitting and bead playing. So when I made the time I picked the Crescents to play with. Also me being me, I had to have some bright colours also.

My aim here is to show you the different looks you get with the placement of the crescent. Image 2 - on the right - you have the crescent ends pointing upwards.
When I reached this point I felt it was okay BUT worried about the points catching on other clothing or scratching someone.

Image 3 - on the left - The pendant was taken back to the bezel and this time I added the crescents in with the end points facing downward. It made for a tighter, more compact design, no points to scratch anyone.

BUT - I wasn't happy with the result.

I felt you couldn't see the back layer of green fire polished beads enough.

Image 4 - on the right - I placed the crescents with the inside end tucked under the mauve size 11/o seed beads. I felt the result was interesting enough and went ahead finishing off the pendant

BUT - I had a nights sleep and woke thinking "I can do better". So, again, the pendant was taken back to the rivoli bezel.

Image 5 - on the left - I needed to increase the circumference for adding in the crescents. I could do that using seed beads but decided I wanted a rigid and 'instant'  extension so I went with 3mm bugle beads (hard to see in the pic).

This gave me the larger circumference I wanted also a greater angle to the crescents for adding the fire polish and the round beads.
When adding in the orange beads I could see the green fire polish weren't going to be large enough. as the circumference has increased more than expected. I was happy with that so a colour change happened and I was able to add in a blue 5mm dyed howlite round bead.

So the end result was great curves, great showing of all beads in each layer and an attractive pendant.  I shall sleep soundly tonight.


Sunday, February 15, 2015

Starman Trendsetters


Last year I applied and succeeded to be a Starman Trendsetter - read my post dated August 18 for more information.

Above are two of my designs made for Starman Trendsetters and alongside is a closer look at the pendant. I hope you like them

Two more of my designs are not being shown as yet. I am very excited to say one will become a free tutorial handout and the other will appear later in the year in a publication.

I am doing the Happy Dance !!

Monday, January 26, 2015


On January 13th the British beading magazine Bead & Jewellery - 44th Diamond issue was released.

I am thrilled to say there is a four page story in the magazine about my jewellery journey, also showing some designs I have not shown before.

The proof pages are listed here for you to take a look at.  

If you are wanting to purchase the magazine digitally or hard copy you can click on the image above and you will be taken there OR copy and paste the link below

http://www.beadmagazine.co.uk/magazine.html


Wednesday, January 14, 2015

Teaching at Jellybeads in Mogo, NSW


Last Saturday I taught two short classes in a shop called Jenny Jellybeads in a town called Mogo, on the south coast of New South Wales. 


The town of Mogo was born with the discovery of gold in the 1850’s in the cabbage tree creek. At its peak in the gold rush days Mogo had several hotels and churches, a host of shops and a public school. However the boom was short lived and Mogo gradually declined to become a sleepy backwater.

In the 1980’s Mogo became home to a small group of artists and craftspeople, some of whom still operate in town today. Mogo has continued to evolve, attracting people with sophisticated creative flair. Mogo’s architectural heritage has been maintained with shops and dwellings being built to compliment the surviving miners cottages.

These buildings are now galleries and speciality shops brimming with traditional and modern art, exotic and unusual artefacts, elegant jewellery and home decor, ceramics, collectables, antiques and cafes. This rare blend of contemporary style with old world charm brings a rich cultural feel to Mogo offering visitors to the area a most enjoyable shopping experience in a relaxed atmosphere.

Here are some of the ladies in the class, starting with the shop owner Jenny
(on the right in green) then there is a designer well known in Australian beading circles Christina Armstrong (in red), Judith Brodie (in coral)  and 
Elca Cooper (in turquoise) - also wearing one of my flower necklace designs.

We had a great time, a lot of laughs and enjoyed the day - or so they told me - I hope they weren't just being nice. LOL

Jenny is hoping to promote Summer Workshops in her store each year and I am very pleased I could be part of her plans. It is most definitely worth keeping an eye on what's on in her shop. http://www.jellybeads.com.au 

I almost forgot - what did I teach?? I taught my "Mojo" earrings and my "Blooming Spikes" ring. The tutorials for each are now in my Artfire store - click the link on the right.